MicroscoPy: Build Your Own Low-cost Digital Microscope using Raspberry Pi
Table of Content
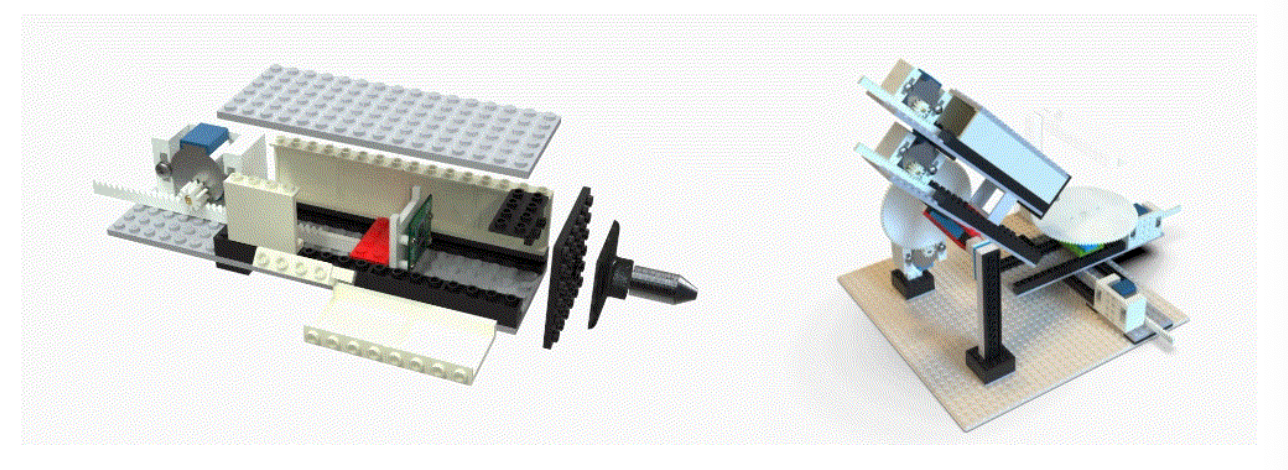
MicroscoPy is an open-source MICROSCOPE built using LEGO bricks, 3D-printing, Arduino and Raspberry Pi.
The project is started by Yuksel Temiz, an engineer and a designer from Switzerland, who later released it as an open-source for educational purposes.
It is released and hosted by IBM, with full instructions, video tutorials for anyone who wants to build a simple, usable digital microscope using affordable materials and resources.
We highly recommend this project for educational purposes for school, and university students, as it's fun, but also carries a high educational value.
With this project you will learn:
- Raspberry Pi setup
- Arduino setup, basic programming and configuration
- How to setup, configure, use and customize your camera
- Use motors and control your camera angles
- Basic Arduino and Raspberry Pi electronics
- 3D printing setup
Project Key Features

- Fully motorized: Camera angle, sample position, magnification and focus can be adjusted precisely using six stepper motors.
- Modular: Stages and modules can be arranged in any configuration depending on the application.
- Versatile: Uniform illumination guarantees high quality imaging for a variety of samples with reflective or transparent surfaces.
- Wide magnification range: Samples with features from several centimeters to several micrometers can be imaged without changing the objective lens.
- Low-cost: The whole assembly costs from $200 to $400 depending on the features and the vendors of the electronic components.
- The microscope uses a Raspberry Pi mini-computer with an 8MP camera to capture images and videos. Stepper motors and the illumination are controlled using a circuit board comprising an Arduino microcontroller, six stepper motor drivers and a high-power LED driver. All functions can be controlled from a keyboard connected to the Raspberry Pi or a separate custom-built Arduino joystick connected to the main board. LEGO bricks are used to construct the main body of the microscope to achieve a modular and easy-to-assemble design concept.
How does the microscope work?

The microscope has a simple operation principle based on changing the magnification and the focus by adjusting the relative distances between a camera, a single objective lens and a sample.
Briefly, two linear stages with stepper motors are used to adjust these distances for a continuous and wide magnification range. Four additional stepper motors tilt the camera module and change the X-Y position and rotation of the sample.
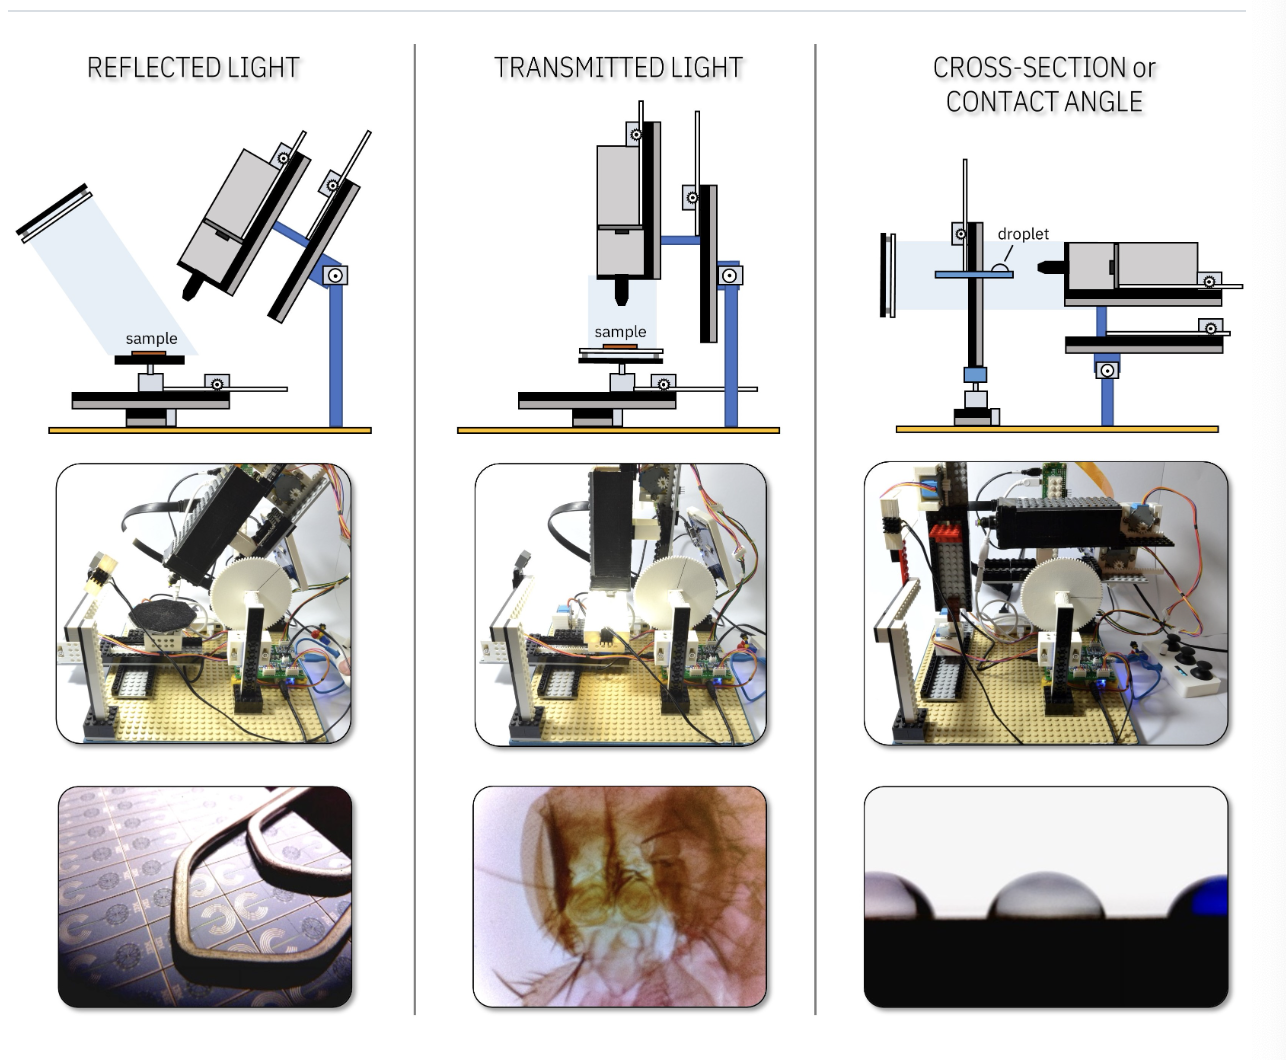
A uniform light source illuminates the sample either from an angle (reflected light) or from the bottom of the sample (transmitted light). The system can also be used as a digital water contact angle goniometer by taking cross-section images of droplets.
License
The project is released under the Apache-2.0 License.


